How to Make a Baby First Birthday Collage in Adobe Photoshop
Past at present, most of us are familiar with the variety of collage apps online and on our smartphones.
Simply exercise you ever wonder how to make a collage in Photoshop? It'southward easier than you recall and we'll evidence you how to do it.


Footstep 1 – Select Your Photos
Once you lot terminate choosing the theme of your project, you demand to select the pictures you lot volition include in it—double-click on the Photoshop icon on your desktop to open Photoshop start.
Often, five to 7 photos will be enough. Only you lot can e'er add more if you lot want.
Your aim is to tell a story with your photos that you could non show with just a single paradigm. Too few photos will non convey enough feeling. Meanwhile, cramming too many images will make everything disruptive.
A conscientious choice of which photos to use is the primal to creating harmonious visuals. Include wide, medium, and close up images. This combination provides a viewer with various perspectives on your subject.
Simply call up it's not a hard and fast rule. You can e'er break it as long every bit yous maintain your theme.
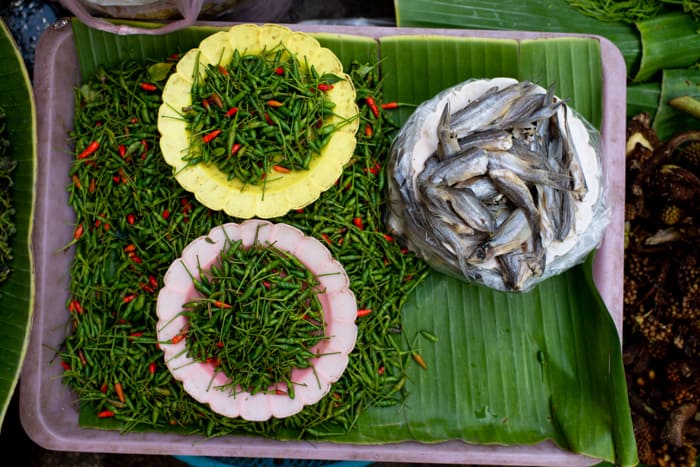
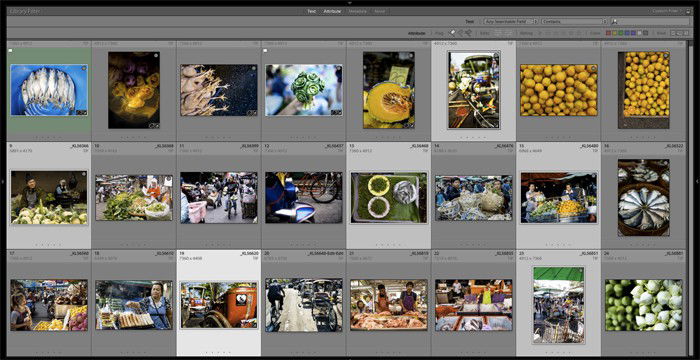
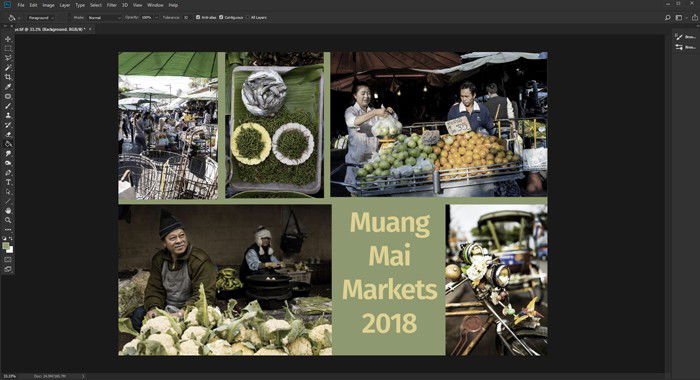
To illustrate the details of this projection, I selected a serial of photographs from the Muang Mai market in Thailand.
I had 24 photographs in my folder and narrowed my choice down to 13. Subsequently that, I discarded fifty-fifty more until I reached the final six. My collection includes wide, medium, and close upwards photos and some vertical and horizontal images.
When you choose your photos, await for images with like colours and shapes in them. These common elements will help requite your photo collage for Photoshop more than cohesion.
At this phase, you do non have to cull your final images. Having eight or 10 or more volition give y'all some flexibility when you begin your layout.
At the same time, don't select too many, though, as this can inhibit your progress.
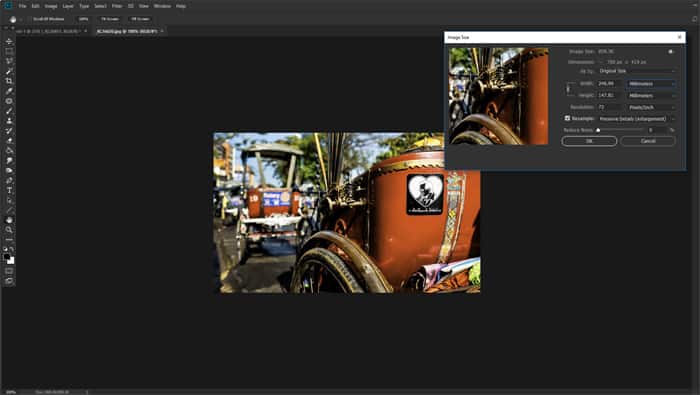
Step ii – Resize Your Photos
Now y'all need to resize your photos. Using them at total resolution is not necessary and will possibly slow your reckoner downward.
Think about how you volition brandish your finished photograph collage. If yous are going to print it to hang on a wall or put in an album, your photos volition need to be big.
If yous are going only to share your collage on social media, you tin make your files smaller. For print, gear up the resolution to 300 PPI. For use only on a monitor, set the resolution to 72 PPI.
Decide the dimensions you want to print your photo collage and summate the size for the images. Then make them 30% larger. Making them bigger than yous need volition give you some flexibility to resize them subsequently if y'all demand to.
I sized my photos to be 700 pixels on the long side, which is 247 mm at 72 PPI.
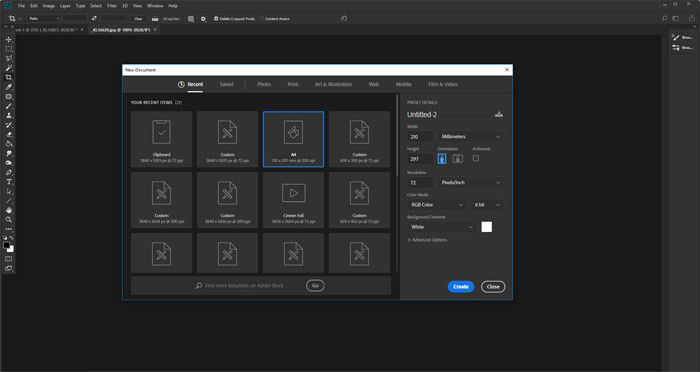
Step three – Create a New File in Photoshop
Open the 'New Certificate' panel in Photoshop and choose a preset or create a custom document. You do not need to exist precise as y'all can always ingather it or add together your canvas size later.
What's crucial is to create a new document with the right resolution. It has to accept the same dimensions you used when resizing your photos in Footstep 2.
For my document, I chose a horizontal A4 size at 72 PPI. It will be suitable for use on a website.
Footstep four – Add Your Photos to Your New File
In that location are many ways y'all tin can add photos to your certificate. I notice the all-time method is to open the binder they are in and drag and drop them onto your document canvas.
Doing so automatically turns them into Photoshop Smart Objects.
Resizing a smart object is nondestructive. You tin too skew, rotate, warp, or apply any transform without ruining the quality. Simply think that yous need to rasterize smart objects before you lot can perform any pixel editing on them.
If y'all want to clone something out, dodge, burn, or brush, you need to right-click on the layer and choose 'Rasterize Layer'.
It'due south best to complete editing the photos first before you resize and import them.
To brand information technology easier to come across the photos you lot are placing, hide the ones you have not however put into position.
Turn each new layer on as you come to add information technology to your layout.
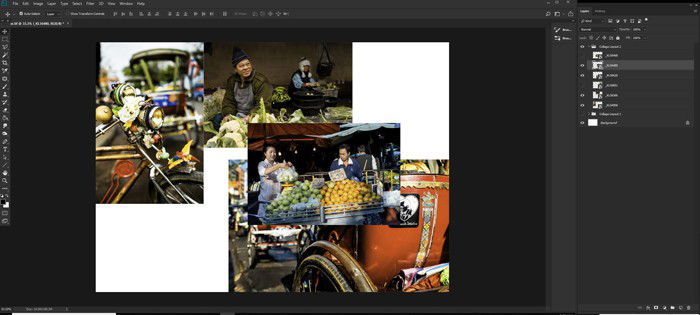
Step 5 – Position Your Photos on Your Collage Sheet
Select your move tool, and so click and elevate the photos into position. You may demand to experiment with this to go information technology looking the mode you want it. You lot can rearrange overlapping photos then they stack the way y'all want them to.
When you have ane file under some other, and you desire to see information technology on superlative, click on its layer in the 'Layers Panel'. You tin then drag the layer upwards. Identify it higher in the order than the photograph that was overlapping it.
Arranging and positioning your photos can exist fourth dimension-consuming. To experiment with different layouts, start a new group with your pictures in the 'Layers Panel'.
To do this, click the 'Create New Grouping' icon at the bottom of the 'Layers Panel'. Name your group. Then select all the layers with your photos and elevate them into the binder yous created.
Now you can indistinguishable the folder, which will copy all the layers – correct-click on the group icon and select 'Indistinguishable Group'. Collapse one of the groups and hide it from view and so start repositioning your photos once again.
You can duplicate a group every bit many times as you want. Collapsing them and hiding them from view makes the new group easier to manage.
Tweak the positions and epitome sizes of each one until you are happy with the new image.
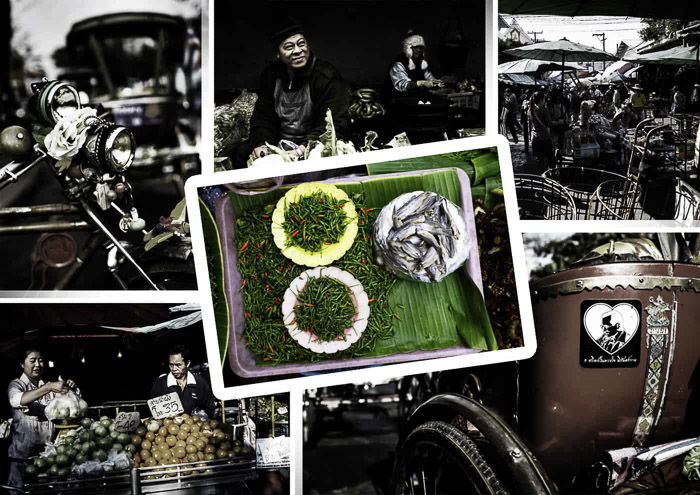
Step 6 – Add Borders to Your Photos
An choice y'all might like to endeavour is calculation borders to your photos. Doing so makes your collage expect similar old-style printed photos.
Select one of your photos, from the fx icon at the bottom of your 'Layers Panel', select 'Stroke'. In the 'Layer Style' window that opens, adjust the size, position, opacity, and colour.
For this version of my Photoshop collage, I fabricated my borders white and 25 pixels wide at 100% opacity. I then positioned them on the outside of the photo edge.
You can add a edge to each photo individually if you want to make them unique to each photo.
If you want the borders all the same, right-click on the layer where yous added the stroke and click 'Copy Layer Style'.
Now, select all the other photo layers, right-click, and choose 'Paste Layer Style'. You can add the stroke you created on the commencement layer to each of your photos.
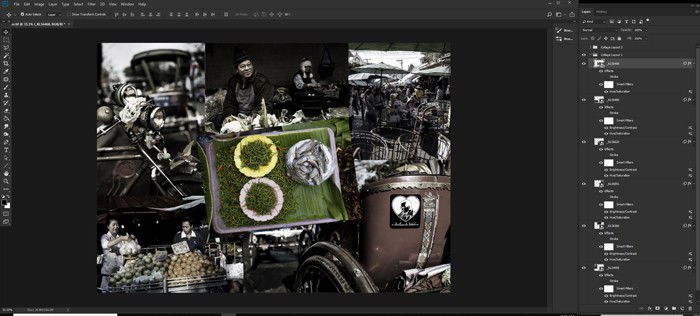
Pace 7 – Adjust the Background Layer Colour
You lot may exist happy with the fashion your montage is looking at this phase. But you might like to experiment and fine-tune your photo collage a petty more.
Click on the background image layer and endeavour changing the colour or adding a slope. The background should support, not overpower, your photos.
Pick a colour that'south prominent in your photograph collage and make this your new background colour.
You lot tin besides keep the background white, or add together a white border around your images.
Decision
Using Photoshop to create a photo collage may seem daunting at first. Just once you lot learn the details of the procedure, you'll see that the steps are quite uncomplicated and easy to understand.
What makes Photoshop unlike from any other collage maker app is that it's endlessly customisable. You can create all sorts of variations of collages and not worry well-nigh seeing another version of it anywhere else. And then go ahead and give it a try!
If you're feeling more adventurous, you can try experimenting with digital collages, also, by following this like shooting fish in a barrel Photoshop tutorial!
Eager to larn more about different post-processing techniques? Why not check out our course Effortless Editing with Lightroom next!
Source: https://expertphotography.com/how-to-make-a-collage-in-photoshop/
0 Response to "How to Make a Baby First Birthday Collage in Adobe Photoshop"
Post a Comment